

Are you having casting problems with your new reel? If you recently made the move to a baitcasting reel, you know that nothing is more frustrating than dealing with backlashes. Backlashes occur when the spool is spinning faster than line is coming through the guide. This causes the line to pile up on itself and overrun itself into a nasty tangle.
Learning how to set up a baitcasting reel is easy, and an important step in becoming efficient using them. To achieve this, let’s go over the entire process of how to setup and adjust a baitcaster.
Line Choices
The best fishing line for learning how to cast baitcasting gear is monofilament. Starting out with fluorocarbon or braid is only going to add to your frustrations.
Fluorocarbon is stiffer and more unforgiving than mono, and if you get backlashes where the line cuts into itself it can actually weaken causing line breakage later. While braided line is smooth it can actually create worse backlashes that require you to cut out large chunks of line to become usable again.
So for those reasons, I recommend using 12 or 15lb monofilament line for learning to cast these reels. There is nothing wrong with mono, it will catch fish just as good as fluoro in most situations, without the headaches.
Fill your reel up to a little under the edge of the spool. You don’t want to fill to the very max because it tends to overrun more easily at the outer layers of line. Now tie on a decent sized lure, something you use frequently like a 1/4 to 1/2oz jig or texas rig.
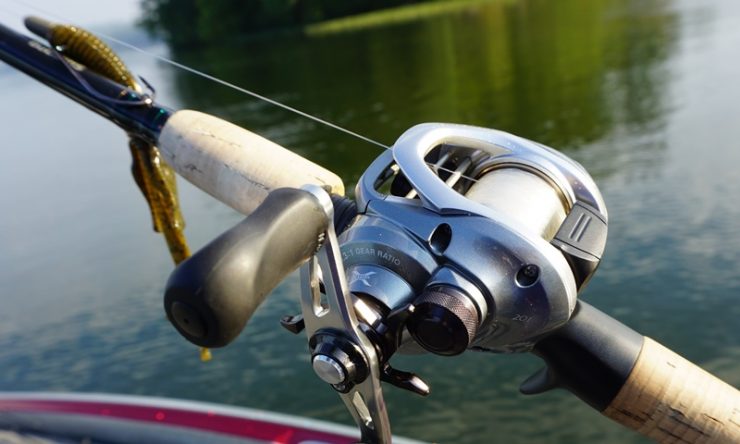
Setting Spool Tension
The tension knob is the small dial on the side plate, usually on the same side as the handle and drag star. Getting this adjusted the right way is the first step to setting up a baitcasting reel for smooth casting.

First, hold the rod up at 2 o’clock and reel your lure up until there is 8-12 inches of line out. Now turn up (tighten) the tension knob so you feel some light pressure. Then push the thumb bar and let the lure go. Your lure should be dropping very slowly, or not at all. Then you slowly release the pressure on the tension knob until the lure starts to fall on its own. Reel up and do it again until your lure can fall slowly to the ground in 2 or 3 seconds time. When the tension is set properly, you should not be getting any line overruns when the lure hits the ground.
You will need to repeat this process each time you go to change baits. It makes sense that a 1/2oz spinnerbait will need tighter tension control than a 1/4oz jig. It only takes a second to make this adjustment once you practice a few times.
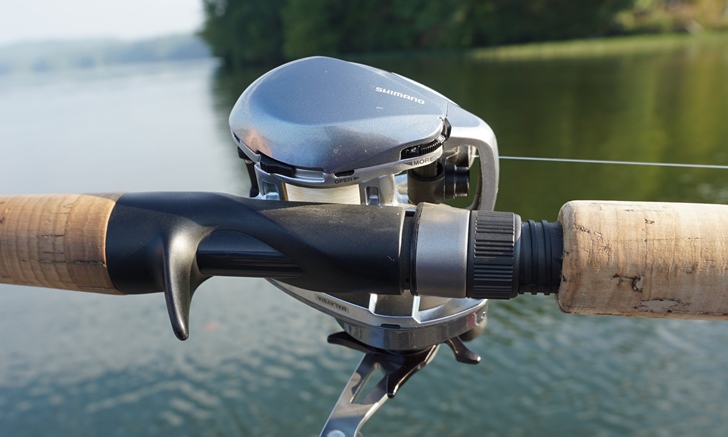
Brake System Adjustments
Figuring out how to adjust the brakes can be the trickiest part of adjusting a baitcasting reel. Even though there are only 2 styles of brakes (centrifugal and magnetic), each manufacturer designs them into the reel a little differently, and performs differently from brand to brand. This is why you see guys using all one type or brand of reel. Once you find something that works well, it’s easier than having 6 different reels each with their own brake system.
Centrifugal Brakes – This system uses small weights on the inside of the side plate to activate the braking. The side plate is accessed using either a dial to unscrew the side, or a lever that releases the plate. I’ve fished a lot of Shimano reels, and they use both methods.

When you get inside the plate you see an arrangement of evenly spaced colored pegs. You can move these to “In” or “Out” position. The Out position is “On”, meaning more weights toward the outside create more centrifugal forces on the mechanism inside the spool causing it to slow down. Remember to turn them on in a symmetrical pattern, because symmetrical means it’s balanced. You can do 2, 3, 4, or 6 pegs on, but I usually only have 2 or 3 on at the most.
13 Fishing reels have introduced a new way of adjusting the centrifugal brakes, where you turn on any of the numbered brake pegs and add the value to reach a number between 1 and 6. So a 3 + 1 = brake setting of 4, and a 1+1+2 also equals a setting of 4.
Magnetic Brakes – Magnetic brakes are a little easier to understand and adjust. This brake system uses a dial on the outside of the reel side plate to adjust the brake strength. Abu Garcia and Daiwa commonly use magnetic braking systems. The dial can read MIN and MAX, 1 to 10. Just like on the centrifugal system, the higher the setting, the more braking will be enabled on your cast. Beginner bass fishermen can start high, like from 70 to 80%. After a lot of practice you be dialing this back to 20 or 30%.
Hybrid Brakes – Some newer reels from Abu Garcia, Pflueger, and others have adopted a hybrid braking system that utilizes both magnetic and centrifugal brakes. The adjustments are made the same way, but each would be set a little lower to begin with. If that sounds complicated, it sort of is. I wouldn’t go out of my way to get a reel with a “Hybrid Brake System” just because it sounds cool. I choose to stick with what works.
Setting the Drag
Setting the drag on a baitcasting reel is extremely simple. There is a big star shaped dial sandwiched between the reel handle and the reel body. Turn this star forward to tighten the drag, and toward you to loosen. You want the drag to be tight enough that it won’t slip on the hookset, and not so tight that it won’t give at all. Just give the line a tug and slowly click the star wheel down until the line takes good effort to pull off the spool.
How to Make Adjustments
Now that you have the basics down, it’s time to make some test casts. Check that your spool tension and brakes are set the way we just talked about. Now make a few easy casts and feel what the reel is doing. Increase the strength of your casts as you become more comfortable with it.
The distance might disappoint you at first, but you shouldn’t be getting any backlashes. Next you will slowly back off the brakes and continue practicing thumbing the spool. As you get better you can lower the brakes and make some long casts look easy.
One final tip is to turn up your brakes if it’s windy. Firing a hard cast into the wind without properly set brakes or an expert thumb is recipe for a huge backlash. Don’t say I didn’t warn you! Turn up the braking and try roll casts to reduce the chance of an overrun in the wind. Keep practicing and you will be slinging baits with ease before you know it.


Unless you are dyslexic, 2:00 is over your head and shoulder pointing almost directly behind your back. So I’m supposed to drop my lure behind my back at 2:00 to adjust my spool tension? If I’m wrong, please enlighten me. If you’re wrong, please correct your otherwise good advice.
Can we take a minute to confirm the clock positions commonly used in fishing? 12:00 is rod straight up. 6:00 is rod straight down. 9:00 is rod straight out in front of you. 3:00 is rod straight BEHIND you. These are the reel positions that it seems almost everyone in the fishing world uses. If I’m wrong, please enlighten or tell me where I can get dyslexic classes so I can deal with the fishing world.
🙂 Does it really matter Karl? Going clockwise seems pretty logical to me. Let’s not over-complicate something so simple.
I knew 10 and 2 while holding the steering wheel meant I needed to cross my arms!